Well sort of, at least 🙂 In this blog post we are building a little assistant running on your nvidia GPU.
While you may not need an nvidia GPU at all, or may be able to run this on and AMD GPU, it will not be described here.
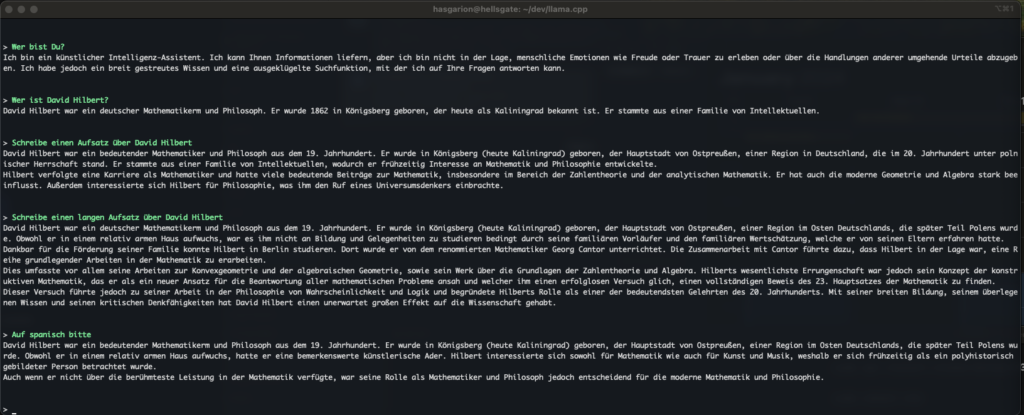
Before we get started, let’s have a look on the goal we are going to complete today:
Credits
This blog post is merging work efforts from different parties. Please see the author or credit information in the repositories of each tool. I am happy to be able to stand not only on the shoulder of giants, but instead to float on an endless ocean of wisdom and work of others.
Nvidia drivers and tools
So let’s start to begin 😉 We will need an Ubuntu (Server) machine for this. I am using the server edition, since my machine sits headless on the shelf.
We need to start with installing the nvidia drivers and toolkit.
wget https://developer.download.nvidia.com/compute/cuda/repos/ubuntu2204/x86_64/cuda-keyring_1.1-1_all.deb
sudo dpkg -i cuda-keyring_1.1-1_all.deb
sudo apt-get update
sudo apt install build-essential cuda-12-3 #pinning to a version so future updates wont break silently
sudo reboot
You may have noticed, I pinned to CUDA version. This makes a lot of sense to me, since many tools and python packages rely on a specific version of CUDA and the libraries. Instead of getting a silent update, I want to have the package manager complain, so I can make a planned upgrade.
After the reboot has completed, nvidia-smi should tell you you run CUDA 12.3 and a driver version >= 545.
Llama.cpp
Now it’s time to install Llama.cpp. We will clone the repository from github:
git clone https://github.com/ggerganov/llama.cpp.gitcd llama.cpp
make LLAMA_CUBLAS=ON -j
The Makefile has some sane defaults and should produce a working ‘main’ file to run. We instruct it explicitly to use CUDA with the LLAMA_CUBLAS=ON and we also use the -j parameter to build in parallel.
Models…
Now that we have Llama.cpp in place, we would need to download a model from Hugging Face. For my local example I will use a quite large model with german training data, but you could use any GGUF model you can find.
cd models
wget https://huggingface.co/TheBloke/Llama-2-13B-German-Assistant-v4-GGUF/resolve/main/llama-2-13b-german-assistant-v4.Q8_0.gguf
This can take quite a while depending on your internet connectivity. In this post we are not covering the implications of running models you can download from the internet, but it will be covered in a following post.
System monitoring
Before we launch the model and tinker around, let’s not forget the hardware side of this 😉 To have a close look on the GPU’s load, temperature and power-consumption, we can use
watch -n 1 --color -d nvidia-smito get an awesome overview. The -n 1 tells watch to run nvidia-smi every 1 seconds, and -d highlights changes visually.

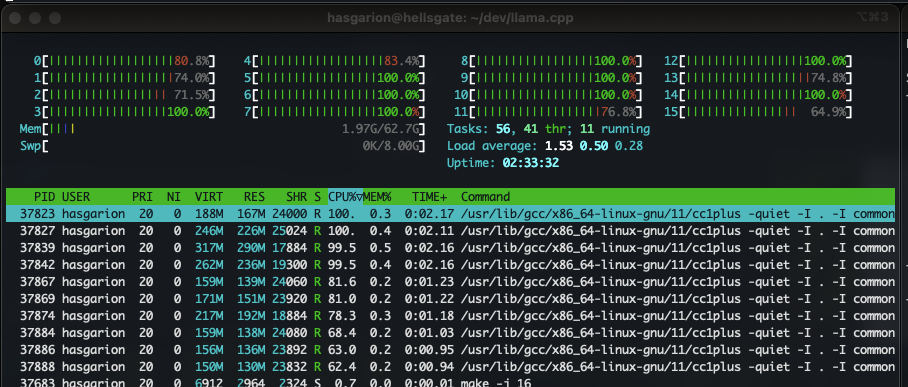
It is also a good idea to have htop running along, so you can see what is going on with your server.
Test the model
./main -ngl 41 -m ./models/llama-2-13b-german-assistant-v4.Q8_0.gguf --color -c 2048 --temp 1.2 --repeat_penalty 1.1 -i -insis all that we need to get that model started mit Llama. During the startup we should look for these lines:
llm_load_tensors: using CUDA for GPU acceleration
llm_load_tensors: mem required  =  195.37 MiB
llm_load_tensors: offloading 40 repeating layers to GPU
llm_load_tensors: offloading non-repeating layers to GPU
llm_load_tensors: offloaded 41/41 layers to GPU
llm_load_tensors: VRAM used: 13053.07 MiB
If possible, the -ngl 41 parameter should be the number of layers mentioned in the output, so the model sits in the GPU memory completely.
The output of nvidia-smi should have changed and should look like this:

and Llama now wants to talk with you, indicated by the > sign.
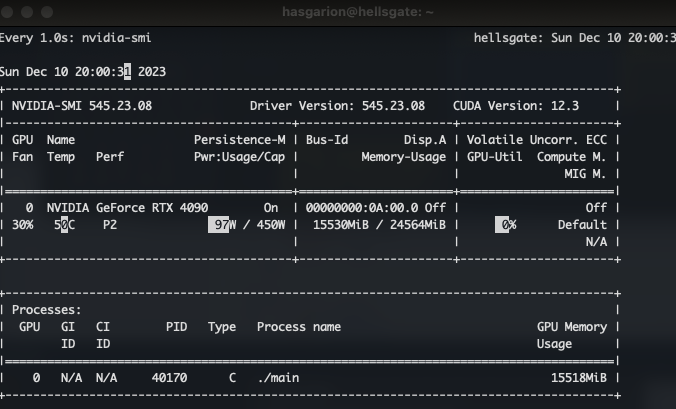
You can test several questions and you will notice the power consumptions and the load change in the output.
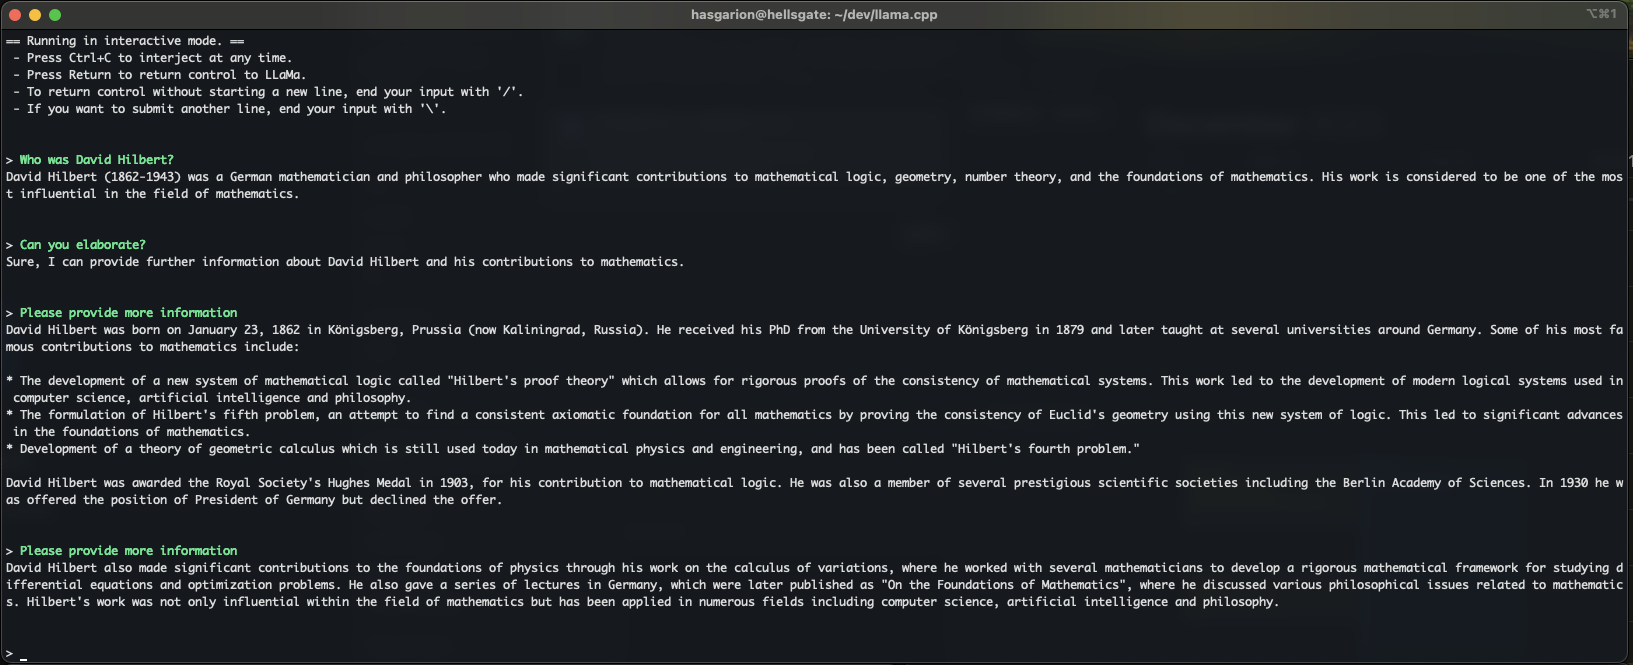
Now it’s up to you to ask smart questions. Have fun 🙂